• Welcome Screen

    After you have successfully downloaded and installed the NAVIE from the Google Play Store or App Store, the application will request the following permissions:

    Location → It is essential to use your actual position when we are trying to navigate you on the route

    Bluetooth → To connect to your bike and calculate your real range it is also essential to use the Bluetooth BLE (Bluetooth Low Energy) of your smartphone.

  • Create an account

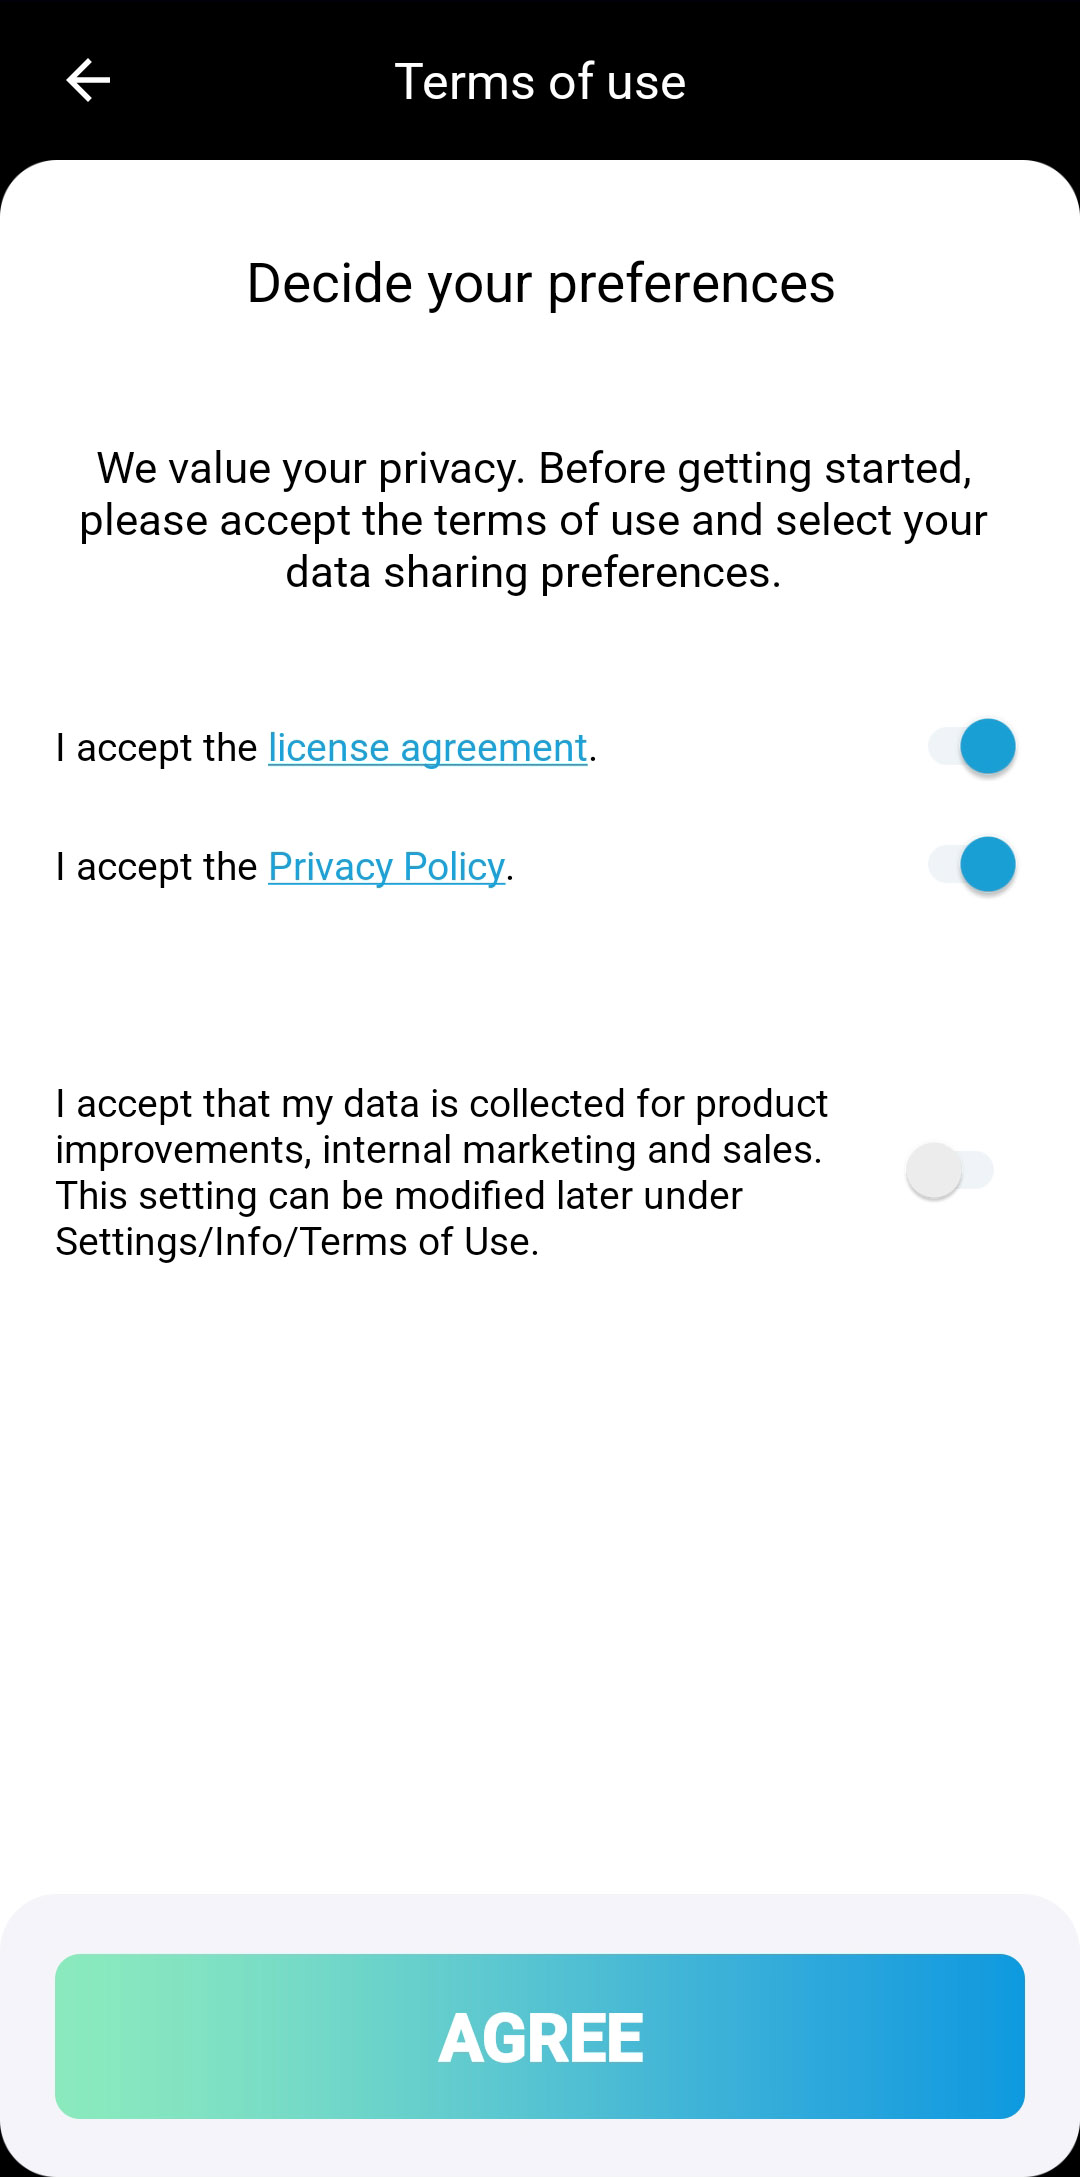
    First of all, you have to read carefully the End-User License Agreement (EULA)and accept the Terms of use, and Privacy Agreement.

    Optional, if you would like to help our work to give you a better product, please also accept that your data will be collected in an anonymous way for product improvements and internal marketing and sales.

    If you agree with this, you can go to the next step and create an account.
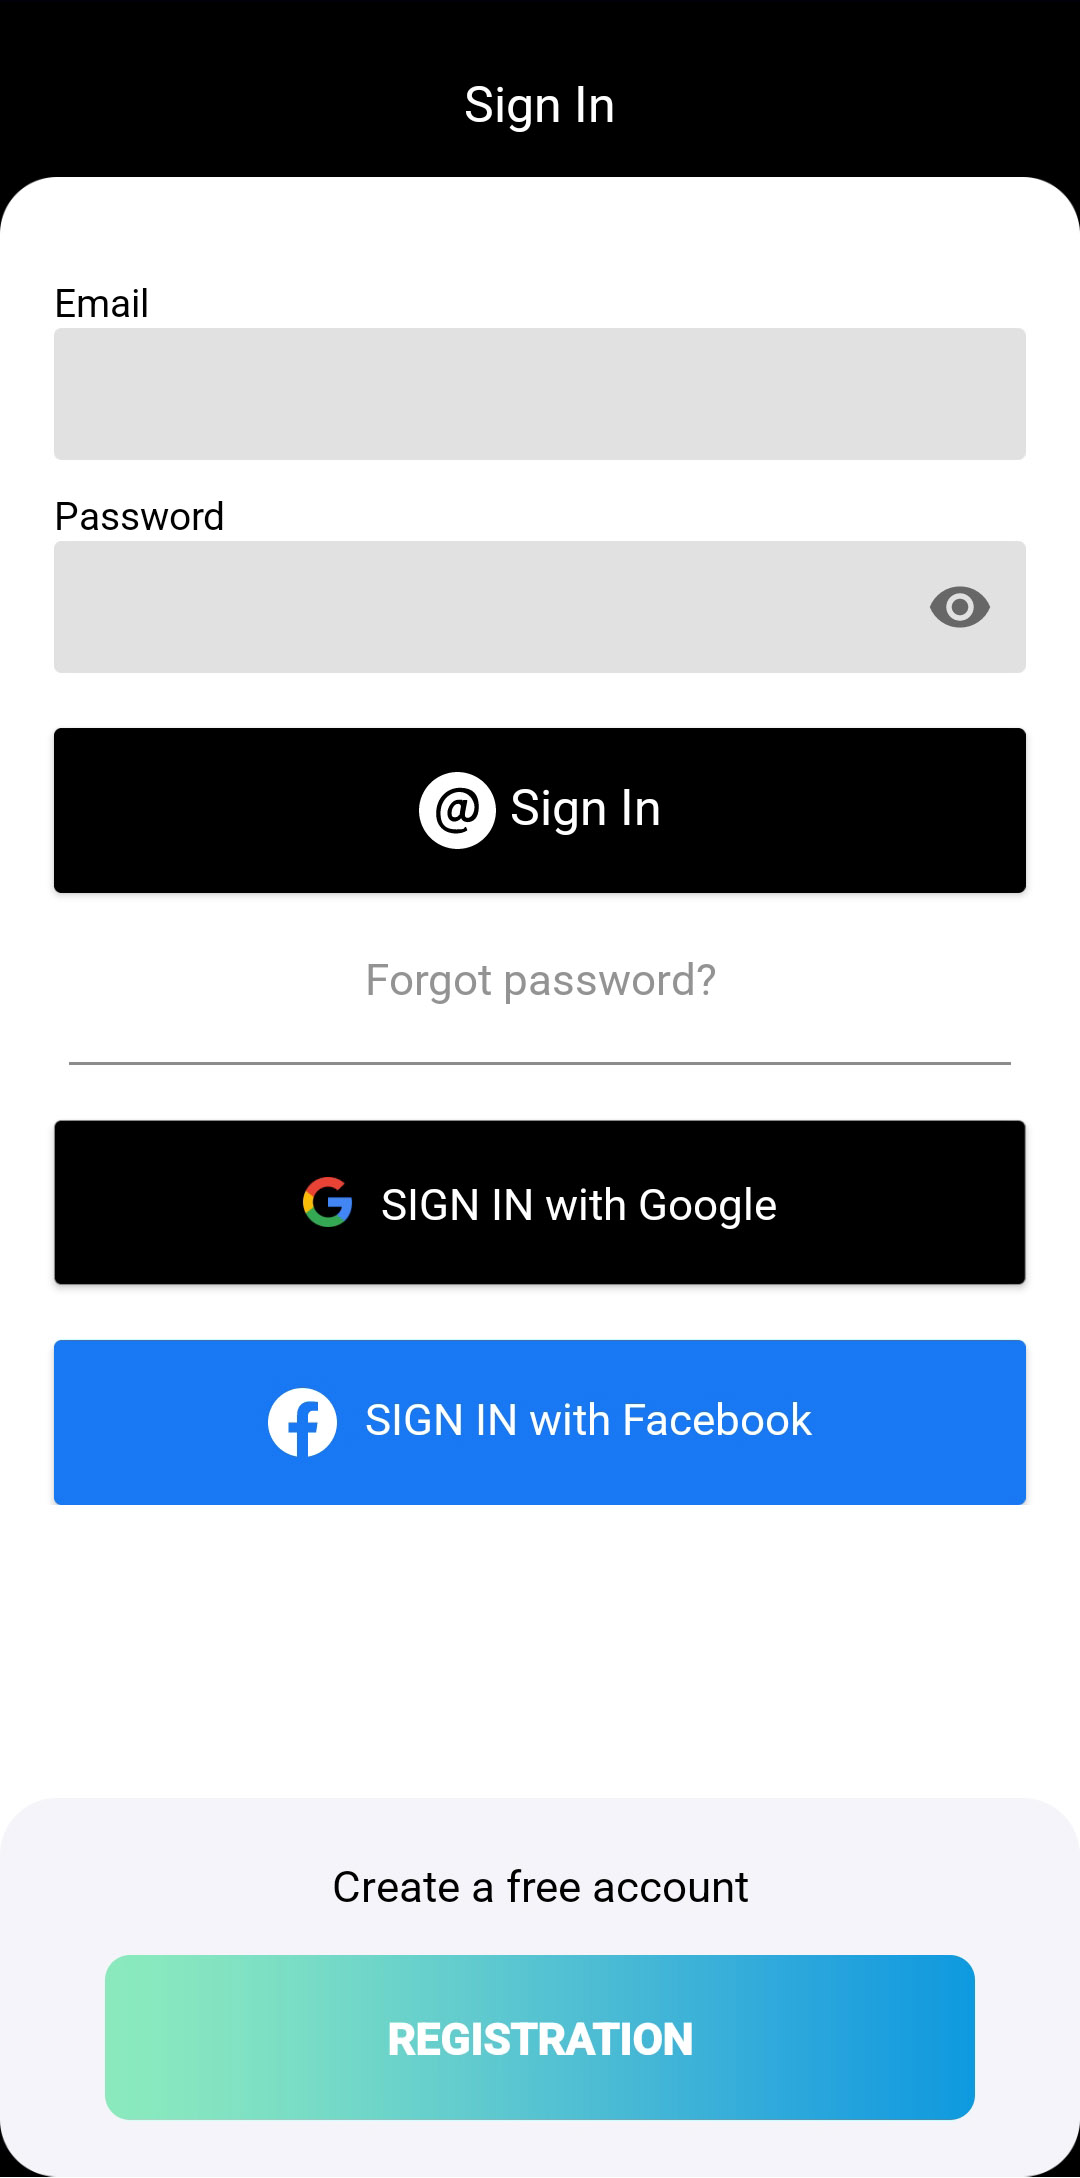
     

    Create an account

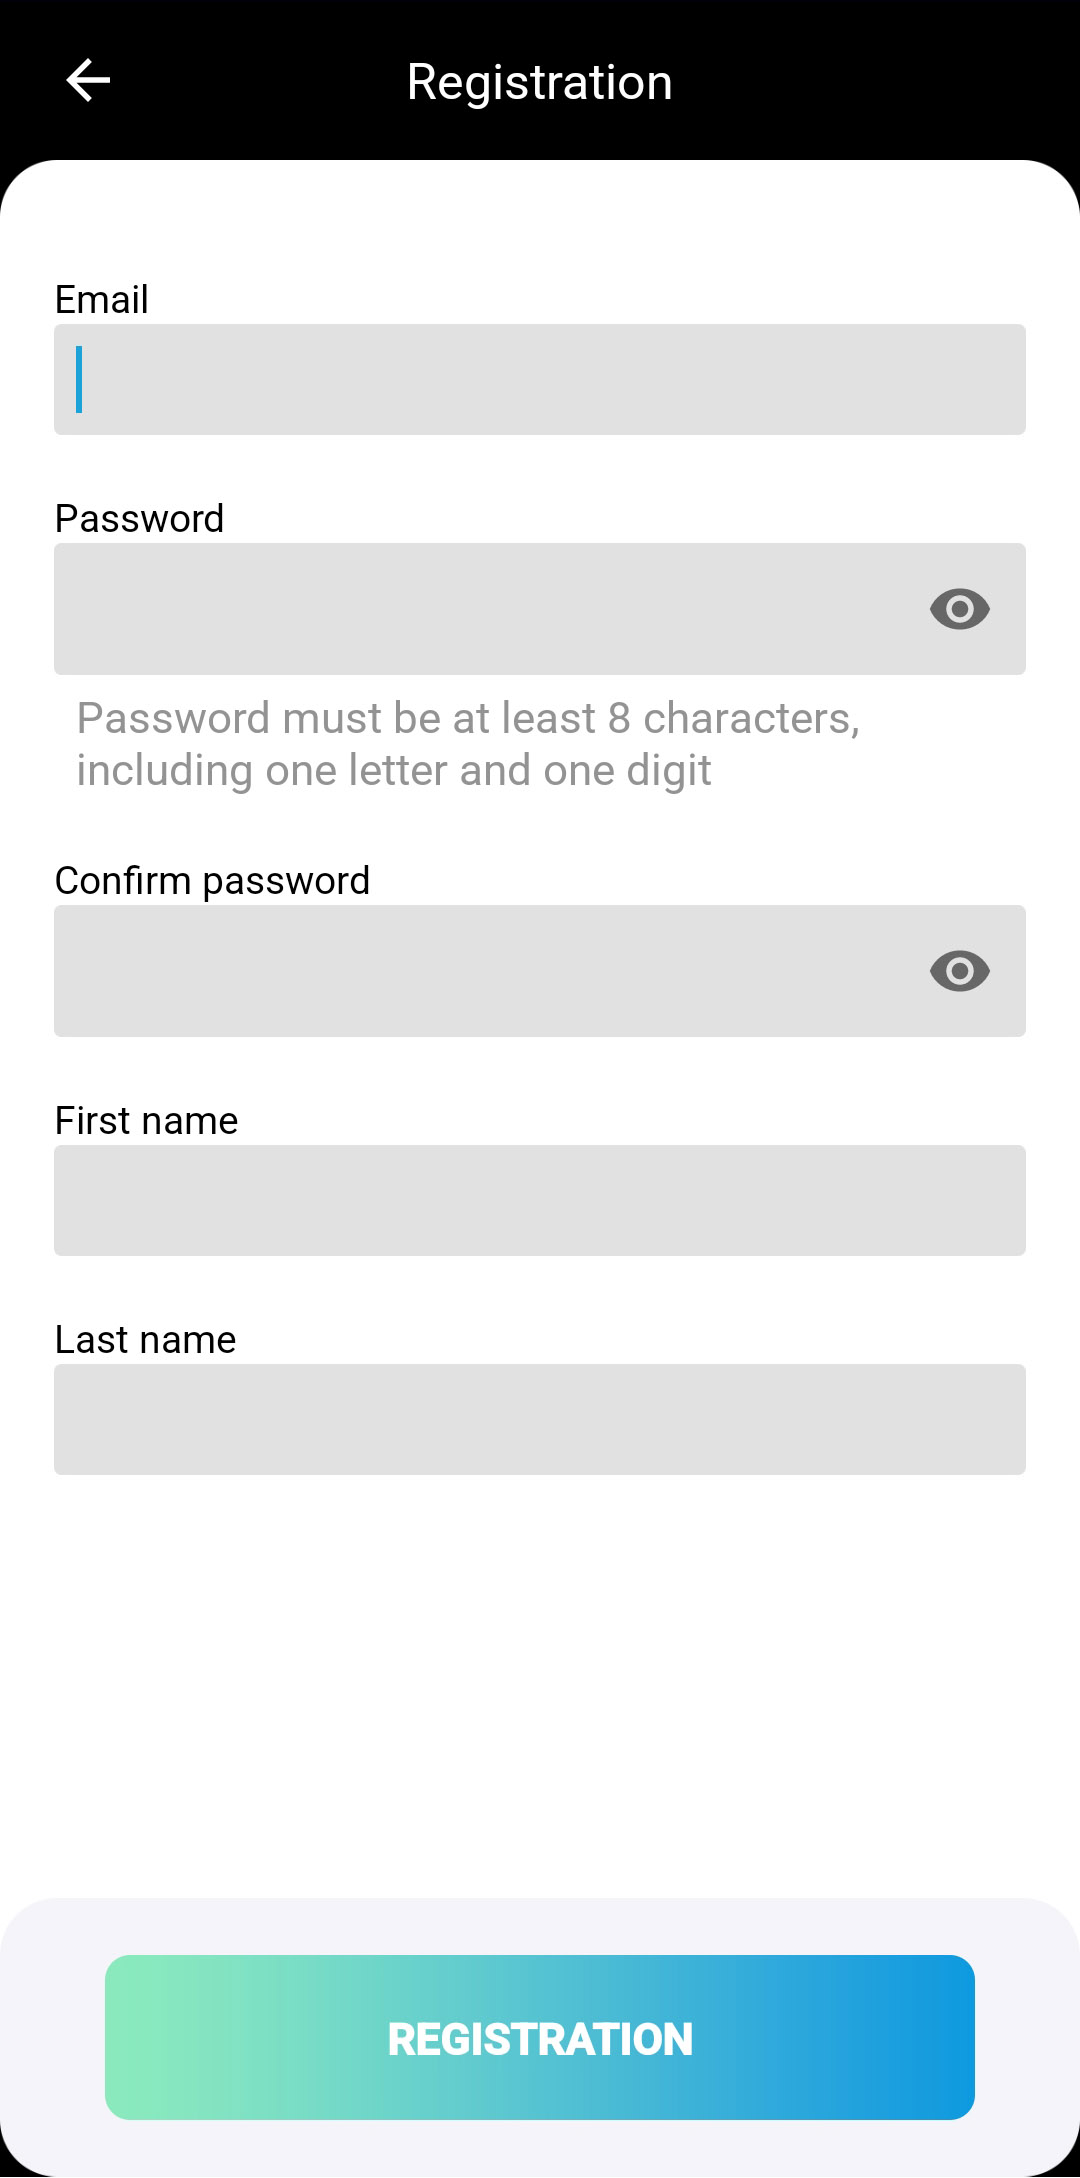
    On the home screen, select the Create a free account an account option and tap the Registration button.

    Email address + password

    Enter your email address and a strong password (minimum 8 characters; must include at least one letter and one digit).


    Registration with social login

    Click the social login button (e.g. sign in with Google).

    Social login (e.g. Google, Facebook, Apple)


    Select the desired account and accept the permission requests.

    The system will send a confirmation email (activation link) to the address you provided.

    After successful authentication, the system will create your account.


  • Offline Mode - offline map

    Navie offers the possibility to display online or offline maps.

    Online maps means that the data are downloaded while you go, there fore it requires less storage space on your phone, but you require a valid Internet connection to get it updated.

    If you plan to cycle in areas where there might be problems to access the internet, then it is preferable you pre-download the map of the countries you need.

    Navie will then use downloaded maps (“offline”) by default and will try to download map data only when you go to countries you do not have on your phone.

    So, after the first login following installation, the system will offer the option to download the map of the user’s current country on the Riding screen.

    You can download/delete different countries from Settings → Maps → Downloaded maps

  • Riding Without Connection

    You can use the Navie app without connecting to an e‑bike.
    If you want to connect your bike, tap the Connection header.

    When not connected, you can still view and use the Riding Screen; however, certain features may be unavailable.

  • Basic Settings

    You can set the default measurement system according to your needs.

    The app will use the following data for providing the best range calculation to you:

    Metric or Imperial
    Gender
    Weight
    Height
    Birth date

  • Connect your bike

    Just tap on the Connect button and select your bike from the list.

  • License Options

    There are three license options available:

    Trial
    Voucher
    Purchase

    You can also use the app without connecting to an e‑bike.

    1.Trial License

    Allows you to test the application for 7 days before deciding whether to purchase a license.
    You can start the trial from the Compatibility Test Screen by selecting “Try 7 days.”
    No email notification is sent when the trial expires.
    After the trial expires, you will see the Package Activation Screen inside the app, and the trial option will become inactive.
    You can explore all main features for 7 days without payment.


    2.Voucher License

    If you received a promo or partner code, enter it in the Voucher field and press Activate.
    Enter the voucher code to activate the application.
    Once the code is validated, the app becomes fully functional according to the voucher’s terms.

    3.Purchased License

    Purchase gives full access without any time limitation.
    Allows you to buy a package directly within the app.
    Unlocks premium features available only with your active subscription or license.

  • Riding Screen

    The most important data of your bike is in the header, such as the actual range and the battery state of charge at a glance.

  • Online Search - Powered by Google

    Feel free to search for an address or a place, you will find it, and you can start navigation right away.

    Just tap on the Search button and type anything that you are looking for. General info will be displayed and you can start the navigation right away. Tap on the ‘GO’ button and select one from the offered routes.

  • Side bar

    The Riding icon also provides information to you whether the recording of your ride is in progress or not.

    If the Automatic recording is turned Off, then you can manage the recording function manually.

  • Draw and Plan

    Simple use your finger and draw a route on the map. The App will calculate a route based on the available rideable roads.

  • Display your range on the map or hide it

    If you want, you can turn off the range display.

  • Disconnect / Connect to your bike

    Just tap on the button to disconnect from your bike.

  • Recorded Trip - Trip Recording

    Recorded trip – Trip recording begins automatically when the bike reaches a speed of 5 km/h, provided that all permissions are granted and location is enabled on your phone. You can stop the recording anytime.

    You can disable the Automatic trip recording from Settings –> Navigation –> Automatic ride tracking, but in this case you will have to remember to start the recording in the Riding screen when you start cycling.

  • GPS cursor - Compass and 3D map - Map view modes and Buttons

    The Navie app offers several map viewing modes to help you navigate easily.
    You can switch between these modes using the View Switch Buttons, located on the right side of the map screen.
    These buttons include:

    Follow Mode Button (Crosshair Icon)
    3D Button
    North Button
    Compass Button


    Follow Mode Button (Crosshair Icon)

    The Follow Mode Button allows you to toggle between 2D and 3D map views.
    When pressed, if the tilt angle is less than 10°, the map switches to 2D Follow Mode.
    When pressed, if the tilt angle is greater than 10°, the map switches to 3D Follow Mode.
    When the map enters 3D mode, the 3D Button appears on the screen.
    2D Follow Mode is the default state of the map when the app starts.


    3D Button

    Press the 3D Button to switch the map to 3D Follow Mode manually.
    This view tilts the camera to approximately 40°, providing a more dynamic perspective of your route.

    When 3D Mode is active:

    The North Button becomes visible.
    The map may rotate based on your movement direction.


    North Button

    The North Button appears only in 3D Mode.
    When pressed, it rotates the map to face North and resets the view to 2D mode.
    After this action, the Follow Mode Button becomes visible again.
    The compass icon will also point North.


    Compass Button

    The Compass Button is available in both 2D and 3D Follow Modes.

    When pressed:

    The map view re-centers and points North.
    The button icon changes back to the crosshair (Follow Mode Button).
    The GPS cursor does not automatically rotate to North unless you physically turn North.

  • Dashboard

    The Dashboard is where you can see the basic and the most important info about your bike such as:

    Battery State of Charge
    The Actual Speed
    Your E-Bike’s Range
    (While you’re cycling) you can see the actual Motor Power and Human Power indications around your Speed/Range
    By tapping on the E-Bike icon, you can reach the E-Bike info page, where you can check the actual motor firmware version

    If you need more data, just swipe left to the Trip Tools.

  • Trip Tools

    All the computers are customizable. With long-tap you can reach the list of available computers:

    Navigation:
    Arrival Time / Distance to Destination / Distance to Next Turn / Distance to Tour / Time to Destination / Time to Next Turn

    Speed:
    Average Speed / Maximum Speed / Speed

    Altitude:
    Altitude / Climb left / Grade / Maximum Altitude / Total Ascent / Total Descent

    E-Bike:
    E-Bike Battery / Assist level / E-Bike Odometer / Range / Remain Battery at Destination / Remain Range at Destination / Battery Temperature / Actual Voltage / Motor Temperature / Motor Current / Average Consumption / Consumption / Fuel Saved / Motor Power / Human Power

    Sensor:
    Average Cadence / Maximum Cadence / Cadence

    Others:
    Length / Total Time / Active Time / Latitude / Longitude / Sunrise / Sunset / Current Time / Calories

  • Planning

    You can start a navigation by:

    Selecting your destination with long tap on the map to see the exact destination address

    Online Search

    Select a recorded/imported track and navigate on it

    If you know where you want to go and you have selected one route from the offered possibilities (Suggested/ECO/Shortest).

    Before you tap on the “GO” button and start your journey, you can check your planned route’s Surface information together the Wind info along your route and the actual Air Pollution Index.

    See the actual turn instruction on the upper left corner of your riding screen. If you are on a different screen, the navigation popup will inform you about the next approaching turn.

  • Recording Trips

    The Navie app automatically saves (Check the Main menu – Recorded trip section) and synchronizes your recorded trips, so you can access them anytime, even if you switch devices or bikes. The bike type as a label next to the city name – e.g., MTB, City, etc. This helps the users to quickly identify which bike was used for each trip.

    Accessing Your Trips
    You can view all your recorded tracks anytime in the Trips menu.

    Each trip you record is automatically uploaded to the server when the recording is finished.

    Your recorded trips are synchronized with your account, so they are always available when you log in.


  • Track Sync.

    All your recorded tracks are synchronized with your account. Synchronization ensures that all data is consistent across every device connected to the same account.

    If you change bikes:

    Your tracks are linked to your account, not to a specific bike. All previously recorded tracks remain available, and you can see your trips made with any of your bikes.

    If you change the bike profile or bike type:
    The trips stay saved and visible in your list — the app keeps them linked to your user account.

    If you reinstall the app (clean install):
    After logging in again, all your recorded trips are automatically re-synchronized from the server.

  • Sharing a Recorded Route

    You can share any recorded route with others.
    Open the Trips menu in the app.
    Tap on the recorded route you want to share.

    The selected route will open.
    On the right side of the screen, you’ll see an arrow icon pointing outward.
    Tap this icon to display the route details.

    In this view, you have two options:
    You can ride the route again by following the saved track.
    Or tap the Share icon (in the top-right corner) to share the route.
    The route will be shared as a GPX file, which can later be imported back into the Navie app.

  • Deleting a Track

    If you delete a recorded track, it cannot be restored manually within the app.

  • Deleting a User Account

    When you delete your account, all saved and synchronized tracks associated with it are permanently deleted from the system.
    These tracks cannot be recovered after your account is deleted.

  • System Settings

    Languages: German, English, Spanish, French, Italian, Hungarian and Dutch languages are supported

    Units: Imperial or Metric units

    Download large files using “Wi-Fi only” or “Wi-Fi and Mobile data” or “Ask always” before you download a map file.

  • Navigation

    Keep Screen on: Always / During navigation / Off → to manage your screen running time

    Navigation popup: On / Off slider → show or not show the upcoming turn instructions

    Navigation Beep: On / Off slider → play a beep when a turn instruction is approaching

    Voice Guidance: On / Off slider

    Automatic Snapping of Tours: On / Off slider → when you import a GPX track, the app will automatically snap it to the road network

    Rerouting for battery conservation: On / Off slider → To ensure you will reach the destination.

    Automatic Ride tracking: On / Off slider → If you turn it on, the app will automatically start to record your route. If you turn it off, you can still manage it manually on the Riding screen.

  • Maps

    Now the application works with online data, it’s not necessary to download country map. The offline map can be useful when internet won’t be available. In this menu point, here you can manage your maps, download new countries or delete those you don’t need anymore. If a map update is available, you will be informed here to download the new files.

  • Account

    Manage your account, change your name or password, or delete your account. You can also personalize your E-Bike, set the E-Bike type, add a unique name or modify your E-Bike’s weight.

    Also, here you can manage your inactive E-Bikes and delete them from the mapped bike list.

  • Info

    General info about the app, such as App version, Map versions and also you can read again the Terms of Use and modify the Privacy Settings.